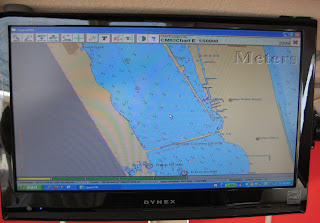
Dynex (from Best Buy) 19 inch LCD HDTV/Monitor shown 'driven' from Asus netbook. One nice thing about the 10 inch netbook is that it will configure via function keys to operate at higher screen resolutions than 800x600. Here it's running at 1024x768. Not shown is USB Logitech trackball off the screen to the lower right.
Forward 'sun shades' are 1/4 inch foam core sheets cut to fit. Spring tension rods hold them in place. Many thanks to Dave and Barb on Robert Sidney for this suggestion.

On the screen is the ICW/Indian River Lagoon in the Melbourne area produced by the vector NOAA S-57 electronic navigation chart database. Download at: http://www.nauticalcharts.noaa.gov/mcd/enc/index.htm
~~~~~~~~~~~~~~~~~~~~~~~~~~~~~~~~
Solar hot water heater built out of a 48 quart Igloo Ice Cube cooler. It holds around 4 1/2 gallons.

These have a list price of $36; I think we found one at WalMart on a sale for around $20.

To build this solar water heater, in addition to the cooler, you need a piece of 1/16" plexiglas, black spray paint, adhesive caulk and epoxy. Measuring from the bottom of the ice cube, I drew a line 7 inches up around the perimeter of the cooler and used a handheld sabre saw to cut along the line (started the cut with drilled hole slightly above the cutline). I then used a can of black Krylon Fusion for Plastic spray paint. Krylon states "The revolutionary no-prep, superbond Fusion for Plastic® now makes painting plastic possible". OK, time will tell.
Then I mixed a batch of epoxy with a microballoon filler (but I'm sure wood flour would be good too) to fill the voids and imperfections and laid a thickened bead along the walls of the cooler cube. I placed the plexiglas--with the protective paper film removed from this side only--on top of the epoxy-setting ice cube. One snag was that the epoxy did not bond securely to the plexiglas--perhaps it would have if I had sanded/roughened up the surface. But a super smooth and flat surface on the ice cube was produced, and the plexiglas came off easily and without 'self-destructing' so at least the cooler and plexiglas were ready for another try.
It was trial, and error, with other adhesives until I stumbled upon the King Kaulk brand. Seems this particular 'hybrid polymer' adhesive does a proper job of bonding to both the epoxy surface *and* the plexiglas. It was around $8 for a 9.8 oz tube, of which I only used about 1/3 of the tube. If I had to build another one I'd try a 3oz. size of 3M 5200. After applying a thick bead of King Kault around the perimeter and giving an overnight for the adhesive to cure, I used a router to trim the plexiglas flush with the ice cube outside walls. I drilled a small vent hole in the plexiglas, removed the protective paper sheet.

The ice cube cooler drain in now the 'supply' pipe. I found that a piece of 5/8 inch clear vinyl hose fits snugly. And a garden sprayer attached, with internal on/off ball valve, works great.
After trying it out a bit, I made a modification as follows: I drilled a second hole--this one 1/2 inch--in the plexiglas top (carefully or that surface would crack) and epoxied a plastic male garden hose adapter into the hole. Now I can either pump, siphon or use a funnel to refill the solar water heater where it's fastened to the rooftop.
~~~~~~~~~~~~~~~~~~~~~~~~~~~~~~~~~~~
Radar installation

Radar pedestal base created out of 6 inch schedule 40 PVC pipe and two circular epoxied 1/4 inch plywood parts. 6 inch pipe was cut to about 10 inches in length--I wanted the radome to just 'peak' over the roof-mounted A/C. You don't want an air draft any higher than necessary!
What you can't see is that the plywood already epoxied to the pipe has a 4 inch hole to cover the roof-installed service cap, see below.

I used a 3/4 inch PVC service cap (available at any Lowes). After cementing a short length of 3/4 inch PVC pipe to the cap, I used a hole saw to drill thru the roof, and then epoxied the service cap/pipe assembly in the roof hole. Pipe stub does not stick out inside the cabin--it's flush with the overhead.

Assembled, painted and installed pedestal mount and radar. The reason I used the service cap, rather than drill a small hole just to accomodate the radar cable, is that I also have a coaxial TV antenna cable routed thru the service cap, and, should I need to replace the radar (this Simrad unit I had used on a previous boat of ours) the cap make the job of change-out much simpler.

Simrad Anritsu RA 772 display head on the starboard side of helm.


No comments:
Post a Comment